I used to lose money chasing stocks that were going up. It was frustrating and expensive.
Then I learned the “rubber band rule”: prices always get stretched too far, and eventually, they must snap back to the average.
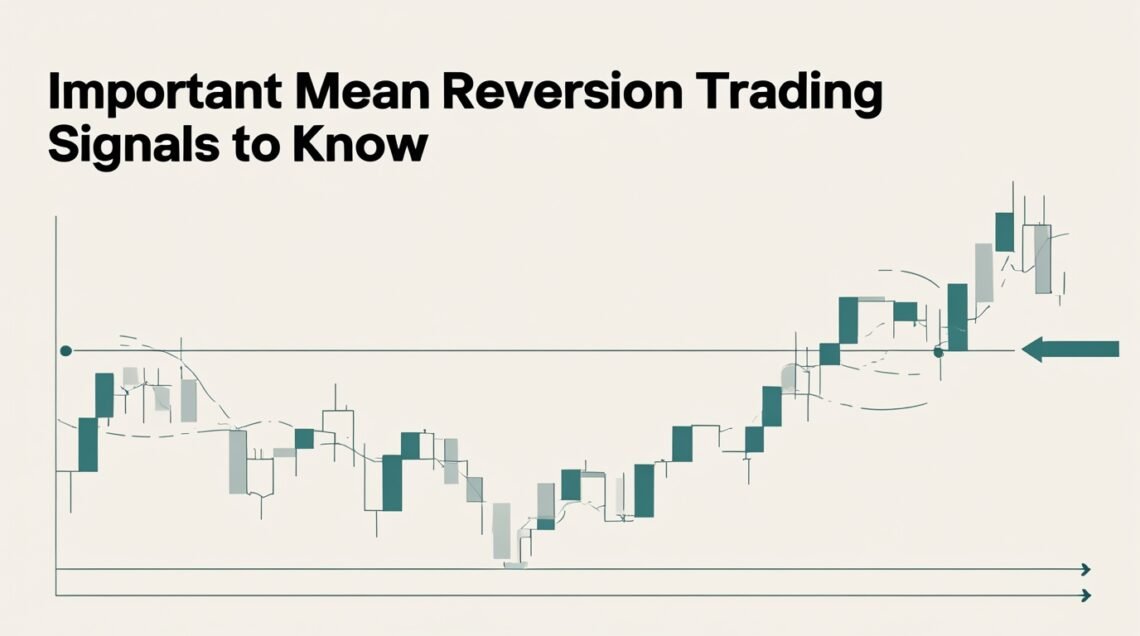
This is my personal guide to the simple trading signals I use to find those stretched prices, trade the bounce, and finally stop losing money to momentum. Let’s dive in.
1. Understanding Why Prices Always Snap Back to the Average:
When I first looked at a stock chart, all I saw was a messy, zigzagging line. It felt totally random, like flipping a coin. I thought the only way to make money was to guess where the price was going next.
But then my mentor explained the most important idea in short-term trading: Mean Reversion.
It sounds like a complicated math term, but it’s actually the simplest and most comforting idea in finance. It’s the law of averages working in the stock market.
The Average Price:
Every single stock or financial item has an average price over a short period (like the last 20 days). This average price acts like a center of gravity.
Imagine a long, straight line drawn right through the middle of the zig-zagging price chart. That line is the average.
- When the price goes way above that average line, it’s like a helium balloon that has floated too high. The supply and demand balance gets out of whack, and eventually, gravity has to pull it back down to the average.
- When the price goes way below that average line, it’s like a bowling ball dropped too far. It got oversold, and eventually, it has to bounce back up toward the average.
Mean Reversion is simply the name for the movement of the price back to the average line. My whole trading strategy changed from trying to guess the future to just watching the rubber band stretch and waiting for the snap back.
The Moving Average:
To trade mean reversion, the first thing I had to put on my chart was the Moving Average. This is the tool that draws that invisible “average line” on the chart for us.
I found the 20-period Simple Moving Average (SMA) to be the most helpful. It’s just the average closing price over the last 20 candles (or 20 hours, or 20 days, depending on my time frame).
I think of the 20 SMA as the relaxed shape of the rubber band.
- If the price is touching the 20 SMA, the rubber band is relaxed, and I usually don’t do anything.
- If the price rockets far away from the 20 SMA, I know the rubber band is stretched, and a bounce back is likely.
The Emotional Trap:
Why does the price even leave the average? Because of human emotion.
- Fear (The Oversell): Imagine a company releases bad news. Everyone panics, sells their stock immediately, and the price drops way too fast, far below the average. The stock is suddenly a bargain, but panic selling keeps pushing it down. The rubber band is stretched way down.
- Greed (The Overbuy): Imagine a popular YouTuber recommends a stock. Everyone rushes to buy it out of excitement, pushing the price far above the average. The stock is now overpriced, but FOMO (Fear of Missing Out) keeps pushing it up. The rubber band is stretched way up.
Mean reversion trading relies on the idea that eventually, the smarter money steps in and realizes the price got too emotional and will correct itself back to fairness. We are simply waiting for the emotional stretch to end so we can trade the correction.
Understanding this core rule, that prices are always magnetically attracted back to the average, is the foundation. But just looking at the average line isn’t enough. I needed specific signals to tell me exactly when the rubber band was at its breaking point. That’s where our first indicator comes in.
2. My Simple Trick with the RSI Indicator:
I learned the “Rubber Band Rule”, that prices tend to snap back to the 20-period moving average. But how do you know when the rubber band is stretched too far? It’s hard to tell just by looking at the price line.
I needed an alarm system that would tell me, “Stop! The emotional selling/buying has gone too fast and too far.” That’s when I discovered the Relative Strength Index, or RSI.
Don’t let the technical name scare you. I think of the RSI as the market’s Emotion Meter or Speed Gauge. It doesn’t tell you the price; it tells you how quickly and intensely the price has changed recently.
The 70/30 Alarm Zones:
The RSI is usually shown as a wavy line below the main price chart, and it moves between 0 and 100. Most importantly, it has two crucial lines drawn on it: the 70 line and the 30 line. These are my alarm zones.
Here is what the Emotion Meter tells me:
- RSI hits 70 (Overbought Alarm): This means the price has gone up too fast, too quickly. The buying frenzy is running on pure greed, and the rubber band is stretched to the maximum upward limit. Signal: I look to sell or bet the price will go down (short), because the snap back is likely coming.
- RSI hits 30 (Oversold Alarm): This means the price has fallen too fast, too quickly. The selling panic is running on pure fear, and the rubber band is stretched to the maximum downward limit. Signal: I look to buy, because the bounce back is likely coming.
If the RSI line is sitting comfortably between 30 and 70 (say, around 50), I don’t trade mean reversion. The market is relaxed, and the rubber band isn’t stretched enough to guarantee a move.
My Rule:
When I first started, I used to try to buy when the RSI hit 35 or sell when it hit 65. I quickly lost money because the stretch wasn’t strong enough. The price would just keep going sideways.
My personal rule for mean reversion is now very strict: I only look for a trade when the RSI line actually crosses the 70 or 30 line.
- My Personal Success Story (Oversold): I once saw a big stock suddenly drop hard on an earnings announcement. The price crashed, and my RSI line went straight down, piercing the 30 line and hitting 28. I looked at the main price chart, and the stock was miles below its 20-period moving average (the center line). This was the perfect “rubber band snapped to the floor” signal. I bought a small position, and within 48 hours, the price shot back up to the moving average line, and I made an easy profit.
The beauty of the RSI is that it forces you to be patient. It stops you from buying just because the price has gone down a little bit. It makes you wait for the truly emotional, stretched-out prices where the snap-back is almost guaranteed.
However, the RSI has one big weakness: it doesn’t tell you how far the price will snap back, and sometimes, in a very strong trend, it stays at 70 or 30 for a long time. I needed another tool to see the physical limits of the price, that’s where the Bollinger Bands came in.
3. How I Use Bollinger Bands to Find Trade Spots:
The RSI (our Emotion Meter) was great because it told me when the market was feeling greedy or fearful. But I still had a problem: the RSI didn’t tell me where the actual price boundary was. I needed a tool that showed me the physical limit of the stretched rubber band right on the main price chart.
That’s when I discovered Bollinger Bands. I think of these as the market’s Boundary Lines, they are drawn directly above and below the average price to show the expected maximum stretch.
The Three Lines of Safety:
Bollinger Bands are made up of three lines plotted right on the price chart:
- The Middle Line (The Average): This is the exact same 20-period Moving Average (our rubber band center) we talked about in Section 1.
- The Upper Band (The Greed Limit): This line is usually far above the average. It’s the limit where the price is considered excessively expensive or “too high.”
- The Lower Band (The Fear Limit): This line is usually far below the average. It’s the limit where the price is considered excessively cheap or “too low.”
The rule of Bollinger Bands is that the price spends 90% of its time inside these two boundary lines. When the price touches or crosses one of the outer bands, it’s a huge signal that the rubber band has been stretched to its mathematical limit.
Trading the Outer Band Touch:
For mean reversion trading, touching the outer band is the perfect signal for an entry, especially when combined with the RSI signal.
- The Oversold Signal: If the price hits the Lower Band (Fear Limit) and my RSI is also down near 30, that’s a perfect signal to buy. The market is mathematically stretched to the floor, and the emotional alarm is screaming “Oversold!” This is a high-confidence trade because two different tools are confirming the same extreme stretch.
- The Overbought Signal: If the price hits the Upper Band (Greed Limit) and the RSI is also high near 70, that’s my cue to sell or bet on a drop. The price is mathematically stretched to the ceiling.
This is much better than just looking at the moving average because the bands adapt. If the market is jumping wildly, the bands get wide. If the market is calm, they get narrow.
The Secret Signal:
While touching the bands is great for finding an entry, my favorite hidden signal from this tool is the Bollinger Squeeze.
Imagine you have a big, active rubber band that suddenly gets squished by a vise.
- When the market is moving wildly, the Upper and Lower Bands are far apart (wide open).
- When the price starts moving sideways and gets very calm, the Upper and Lower Bands start moving very close together, they get “squeezed.”
The Squeeze is a signal that the market is building up energy for a big move, either up or down. When I see the Bollinger Bands squeeze tight, I know the market is in a temporary state of calm, and the rubber band is about to be stretched far in one direction. While I don’t trade during the squeeze, I put the stock on my watchlist, waiting for the price to break out and stretch violently, so I can then trade the snap back!
Combining the RSI and the Bollinger Bands gave me a system: the RSI warns me about the emotion, and the Bollinger Bands confirm the physical price extreme. But I still needed a way to measure the intensity of that movement.
4. Using ATR to Know When the Market is Tired of Moving:
I had my mean reversion system working: The RSI told me when the market was emotionally stretched (time to trade), and the Bollinger Bands confirmed the price extreme (where to enter). But I still had one major piece of the puzzle missing: how big would the snapback be?
Sometimes the rubber band snapped back quickly and hard. Other times, it barely moved before stalling. If I didn’t know the normal level of market movement, I couldn’t set a realistic profit target or, more importantly, figure out my risk.
I needed an indicator to measure the size and speed of the market’s swings, regardless of direction. That’s when I found the Average True Range, or ATR.
The Market’s “Movement Gauge”
The ATR is one of the simplest indicators because it doesn’t tell you if the price is going up or down. It only tells you how much the price is moving, on average, during a specific time period (like one day).
I think of the ATR as the market’s Movement Gauge or Daily Allowance.
- If the ATR value is high, the market is currently swinging wildly (high volatility), and the rubber band is snapping hard. This means bigger profit potential, but also bigger risk.
- If the ATR value is low, the market is quiet and calm (low volatility). This is often a sign of a “squeeze” (from Section 3) or that the market is exhausted after a big move.
Setting Realistic Targets:
The most valuable thing the ATR did for my mean reversion strategy was help me set realistic profit targets.
When I see the price has stretched far past the moving average, I want to know where the bounce back will end. I use the ATR to determine if the market is tired and likely to stop moving soon.
- Example: Let’s say a stock normally trades with an ATR of $1.00. This means that on an average day, the price moves about one dollar from high to low.
- If the price has already dropped $2.00 today (double its normal movement) and is now touching the oversold Bollinger Band, I know the market is emotionally exhausted. It has already done twice its “daily allowance.”
- If I buy for a mean reversion bounce, I use that $1.00 ATR as my target. I don’t try to hold the trade for a huge gain because the ATR is telling me the market is ready to rest.
The ATR prevents me from being greedy. It forces me to take my profit when the snap back has covered the market’s normal daily movement, instead of waiting for an impossible amount of extra gain.
ATR for Risk Management:
The second, and arguably most important, use of the ATR is risk management.
When you enter a mean reversion trade, you need to set a stop-loss, a price at which you automatically sell if the trade goes wrong, limiting your loss. Where do you place it?
Before ATR, I would just guess, putting my stop-loss at a random price, like “10 cents below my entry.” The problem? If the normal ATR is $1.00, my 10-cent stop-loss was so close that the stock’s normal daily “noise” would knock me out of the trade almost instantly.
The ATR fixed this by defining the normal noise level.
- My Rule: I now set my stop-loss at least 2 times the current ATR away from my entry price.
- If the ATR is $1.00, I set my stop-loss $2.00 away. This gives the stock room to breathe and move normally without hitting my safety net, yet still protects me if the market truly continues to stretch against me.
The ATR is the tool that tells me: “This is the risk you must accept to play this game.” It improved my confidence because I knew my stop losses were set based on real market movement, not just wishful thinking.
5. Recognizing When Mean Reversion Doesn’t Work:
I learned the hard way that the “Rubber Band Rule” isn’t the only rule in the market. There are times when the market is so powerful, driven by sustained optimism or major news, that the rubber band doesn’t snap back; it breaks.
My biggest losses came from trying to force a mean reversion trade when the market was clearly in a strong momentum trend. I would see the price hit the Oversold line (30 RSI) and buy, expecting a bounce, but the price would just keep falling and falling for days.
I realized I needed a Time-Out Signal to tell me: “Stop trying to fight the flow! Mean reversion is paused right now.”
Mean Reversion vs. Momentum:
It’s crucial to know the difference between the two forces:
- Mean Reversion: A short-term bounce or correction back to the average. This works best in choppy, sideways, or relatively quiet markets.
- Momentum (Trend Trading): The price is moving strongly and consistently in one direction (up or down). The average itself is moving, and the price never returns to the old average; it just uses the average as a jumping-off point for the next leg of the move.
When a strong trend starts, you have to switch strategies, or at least sit on your hands and wait.
The “Walking the Bands” Signal:
This is the easiest way to see that the market has entered a strong trend that you should not try to fight. It’s a signal I look for using the Bollinger Bands.
In a normal mean reversion environment, the price bounces between the Upper and Lower bands. But when a strong trend begins, the price starts “walking the band”:
- Strong Uptrend: The price sticks close to or consistently touches the Upper Band, almost never touching the Middle (20 SMA) or Lower Band. It just rides the ceiling of the Bands upward.
- Strong Downtrend: The price sticks close to or consistently touches the Lower Band, almost never returning to the Middle or Upper Band. It rides the floor of the Bands downward.
When I see the price walking the band, it tells me the underlying momentum is too strong. If the price hits the 70 RSI during a band walk, I do not sell for a reversion, because the momentum is powerful enough to keep the RSI high for days. This is my Time-Out Signal.
The Slope of the Average: The Directional Check:
My most reliable check for momentum is looking at the slope of the 20-period Moving Average (SMA), the center line of the Bollinger Bands.
Think of the 20 SMA line as a road.
- Flat Road (Mean Reversion): If the 20 SMA is mostly flat or moving sideways, the market is range-bound, and mean reversion trades (bouncing back to the average) are perfect.
- Steep Hill (Momentum): If the 20 SMA is angling steeply up or down, the market is trending hard. You shouldn’t try to trade against a steep slope.
When the slope of the average is steep, and the price is walking the bands, I know the average itself is moving rapidly. The price might briefly dip back to the average, but the average has moved up so much that the “bounce” is minor, and the main move continues. I avoid mean reversion trades completely during these periods and wait for the slope to flatten out again. This simple check saved me from chasing countless losses.
Conclusion:
Learning mean reversion was the key that unlocked my trading success. I stopped chasing the market and started letting the market come to me. Remember: the financial world operates under the law of averages. Use the RSI to measure emotion, the Bollinger Bands to confirm the price limit, and the ATR to manage your risk. Most importantly, only trade when you have confluence, when your signals are all agreeing. Be patient, wait for the rubber band to stretch to its maximum, and trade the snap back with confidence.
FAQs:
1. What is the fundamental concept of Mean Reversion?
Prices that get stretched too far from the average must eventually snap back to that average.
2. Which indicator do you use as your primary Overbought/Oversold alarm?
The Relative Strength Index (RSI), with the extreme boundaries set at the 70 and 30 lines.
3. What do Bollinger Bands primarily signal for mean reversion?
They confirm the exact price level where the market is mathematically stretched to its limit (the outer bands).
4. When should you avoid using mean reversion strategies?
When the 20-period Moving Average is angled steeply, it indicates a strong momentum trend.
5. How do you use the ATR (Average True Range) in trading?
I use it to measure the market’s daily movement, which helps me set safe stop-losses and realistic profit targets.
6. What is the “Confluence Rule”?
Only take a trade when two or more independent signals (like RSI and Bollinger Bands) are confirming the same extreme stretch.